RIO Ed - Short Course Record Header
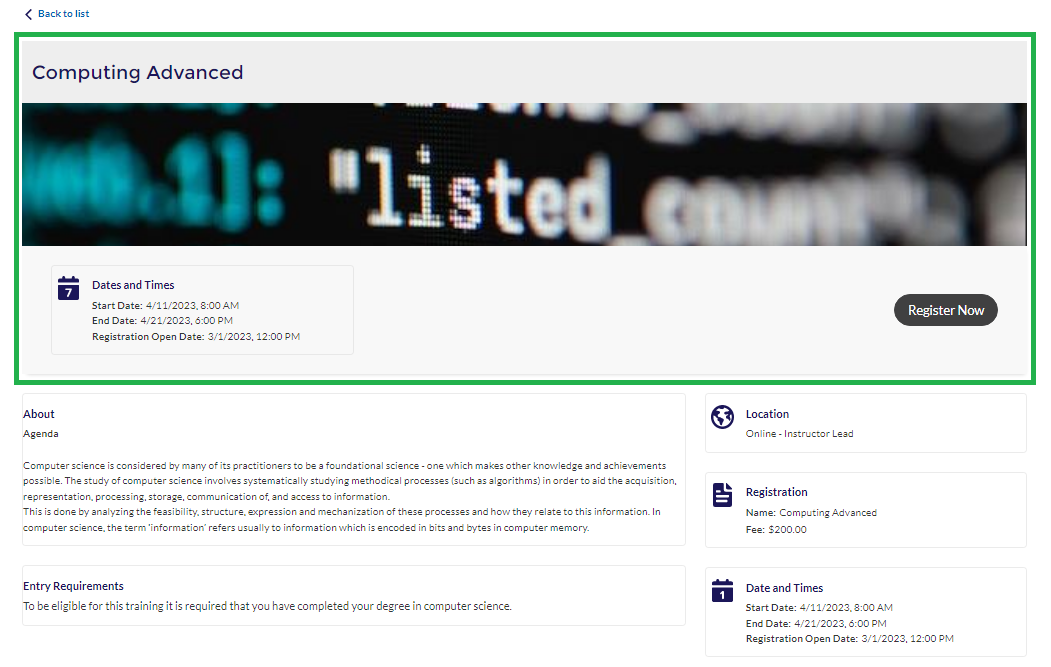
Introduced in v3.12 to support Continuing Education, this component is used on the Student Community, to display the header of a Study Offering's detail page.

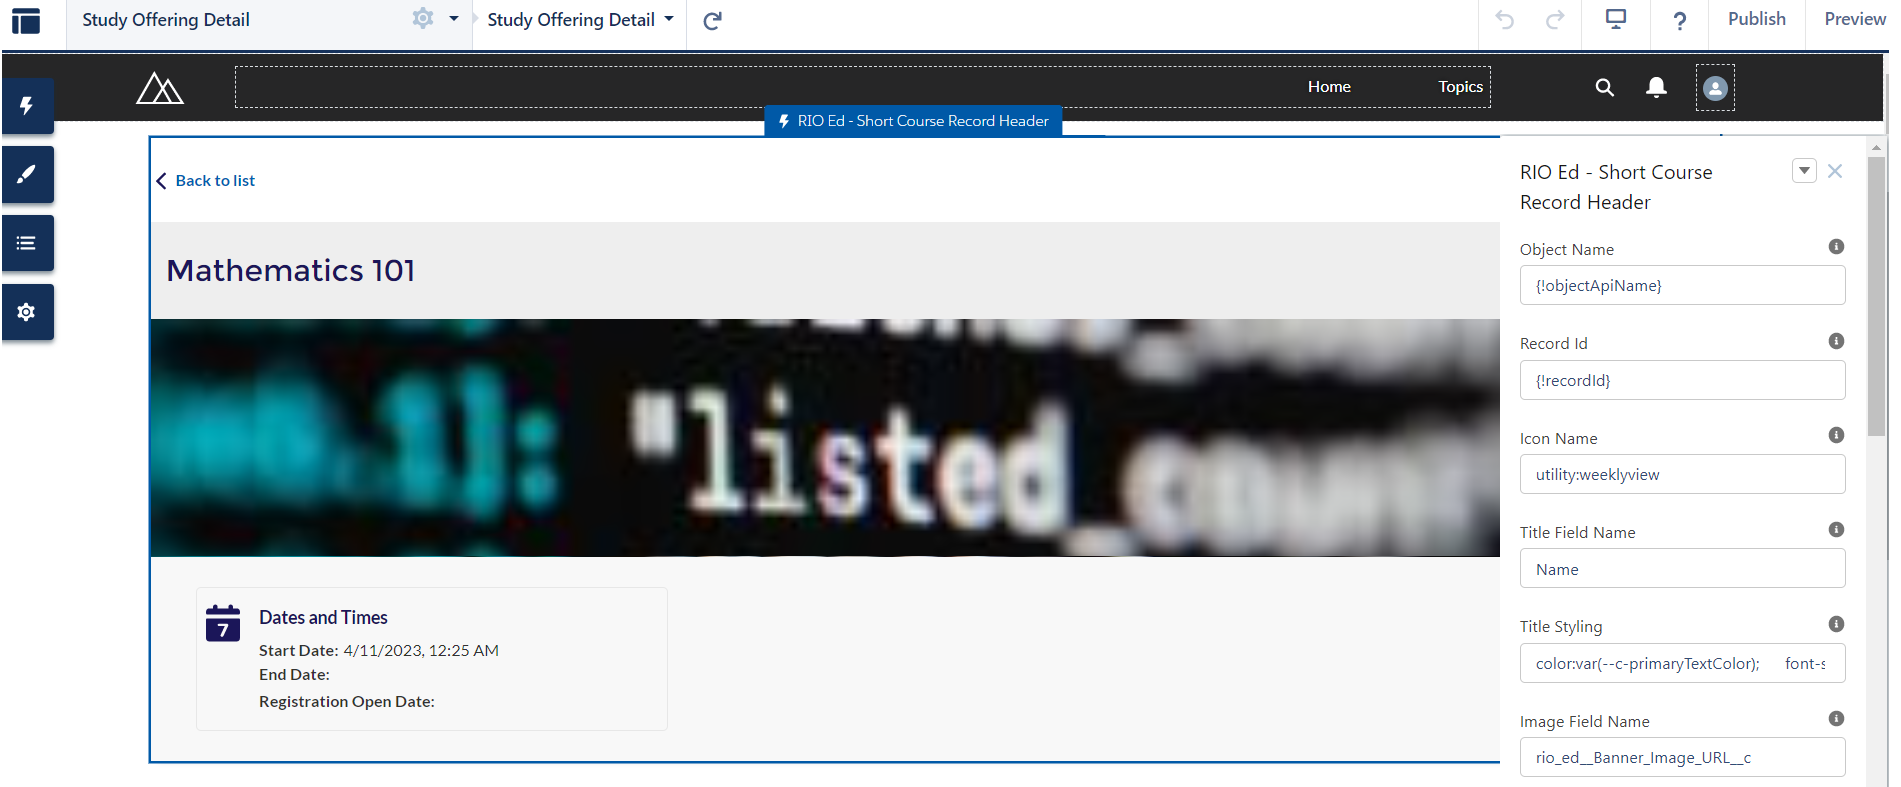
For example, you can create a new object page for Study Offering on the Community Builder (navigate to Setup > Digital Experiences > All Sites).
Then, place this component under the 'Study Offering Detail' page.

This will act as the header of the short course (Study Offering object).
You can also place RIO Ed - Short Course Record Details Card components under this component (on the same page) to display other details, as seen in the first diagram above.
See here for the other components and how they work in relation with one another.
| Attribute Name |
API Name |
Description |
| Icon Name |
iconUtility |
To display an icon for the details displayed enter the salesforce utlity icon name, e.g. utility:weeklyview . |
| Title Field Name |
titleFieldApiName |
Enter a Text field API name, e.g. Name. This will display the value as title of the Study Offering header. |
| Title Styling |
titleStyling |
To define the styling of the displaying title enter CSS attributes here, e.g. font-weight: 600;font-size: 14px; . |
| Image Field Name |
ceOfferingImageApiName |
Field api name for the header image. Add an image of resolution 1880 x 400 pixels. |
| Header for Detail |
ceOfferingHeader |
Enter a value to display as header to define course related information, e.g. Registration details. Registration detail values from the record will be shown below this. |
| Header Styling |
headerStyling |
To define the styling of the displaying header enter CSS attributes here, e.g. font-weight: 600;font-size: 14px; . |
| Field Set |
fieldSet |
Enter the API name of the field set to display details related to an object, e.g. Registration_Field_Set . |
| Field Names |
fieldApiNames |
Add comma seperated field API name to display details for an object if you are not using field set. E.g. rio_ed__Start_Date__c,rio_ed__End_Date__c,rio_ed__Registration_Open_Date__c |
| Field Styling |
detailStyling |
Inline styling of the details to be applicable to all the field values. |
| Show Field Label |
showFieldLabel |
Checkbox on the component, if true, then the field label on the fields will be visible. |
| Back to Filtering List Button Label |
backButtonLabel |
Enter the value which will be displayed as label of back to list button. E.g. Back to list. |
| Back To Site Page Name |
sitePageName |
Enter the name of the site page, which is used for redirecting back to the origin page. |
| Allow Guest Registrations Field Name |
allowGuestRegistrations |
To enter the Api name of Allow Guest Registrations Checkbox. E.g. rio_ed__Allow_Guest_Registrations__c |
| Guest Registration Text |
grText |
To enter guest registrations text. E.g. Please login or create an account to register if you are a returning student. If you would prefer to register without an account please continue as guest. |
| Non-guest Registration Text |
xgrText |
To enter non-guest registrations text. E.g. Please login to your account to continue. |
| Guest Registration Button Text |
grButtonText |
To enter guest registrations button text. E.g. Proceed with Guest User. |
| Non Guest Registration Button Text |
xgrButtonText |
To enter non-guest registrations button text. E.g. Login to Continue. |
| Registration URL |
redirectURL |
To enter the redirect url for registration. You can specify the {!recordId} to have the current record id appended to the url, e.g, /registration/id={!recordId}. |
| Register Now Button Label |
registerNow |
Enter the value which will be displayed as label of register now button. E.g. Register Now. |
| Register Button Condition Field Name |
booleanFieldValue |
This field will be used to enable or disable registration button. If set to true, the registration button will be disabled. If false, the registration button will be enabled. |
| Debug Mode |
enableDebugMode |
Enable debug mode. |