RIO Ready: Guest User Verification Link Functionality Setup
In order to use this Lightning Web Component, you will need to have:
- A publicly accessible Digital Experience Site.
- Guest Users will need to have appropriate permissions configured.
- Custom setting setup.
- An Organization-Wide Email Address.
Below is the setup guide for this LWC:
Step 1: Set up a publicly accessible Digital Experience Site
- Login to Salesforce and go to “Setup”.
- From Setup, in the Quick Find box, enter ‘Digital Experiences’.
- Create a digital experience site (This LWC is designed to be compatible with all LWR).
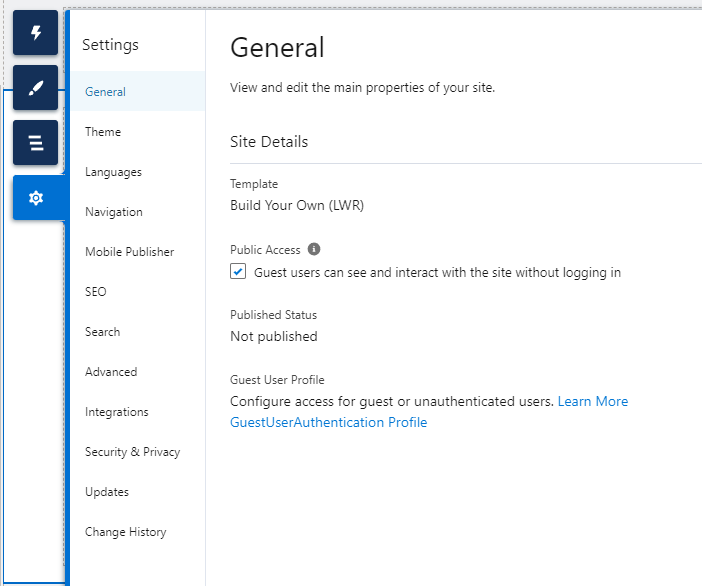
- After creating the digital experience site, click on ‘Builder’, then click on ‘Settings’ from the gear button on the left-hand side. Check the Public Access checkbox to make this site publicly accessible.
- The Lightning Web Component we are using for this features is as shown in the image
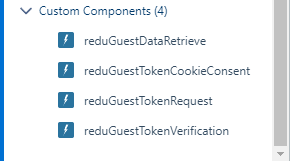
- reduGuestTokenCookieConsent: This component is used to ensure that users are informed about the use of cookies on the website.
| Configurable Attributes | Description |
| User Consent Banner | The text that tell the user about the use of cookie consent. |
- reduGuestTokenRequest: This component allows users to submit their email address to request a login verification link.
| Configurable Attributes | Description |
| Logo Url | The URL to the logo image used in the sign-in and verification pages. |
| Origin Url Query Parameter | The query parameter name to identify the query parameter that contains the origin URL e.g., startUrl from the URL. |
| Sign-in Title Text | The text displayed as the title on the sign-in page. |
| Sign-in Footer Help Text | Additional help or information text displayed in the footer of the sign-in page. |
| Sign-in Footer Action Target Url | The URL where users are redirected when they click on the footer action on the sign-in page. |
| Pending Verification Title Text | The text displayed as the title on the pending verification page. |
| Pending Verification Description Text | Additional description or information text displayed on the pending verification page. |
| Pending Verification Footer Help Text | Additional help or information text displayed in the footer of the pending verification page. |
| Pending Verification Footer Action Target Url | The URL where users are redirected when they click on the footer action on the pending verification page. |
| Verification Success Title Text | The text displayed as the title on the verification success page. |
| Verification Success Description Text | Additional description or information text displayed on the verification success page. |
| Verification Success Image Url | The URL to the image displayed on the verification success page. |
| Verification Fail Title Text | The text displayed as the title on the verification fail page. |
| Verification Fail Description Text | Additional description or information text displayed on the verification fail page. |
| Verification Fail Image Url | The URL to the image displayed on the verification fail page. |
| Verification Fail Action Target Url | The URL where users are redirected when they click on the action button on the verification fail page. |
- reduGuestTokenVerification: This component is used to display the status of token verification. When users click on the verification link sent to their email, they will be redirected to a page where this component is used to show whether the token verification was successful or not.
| Configurable Attributes | Description |
| Logo Url | The URL to the logo image used in the verification pages. |
| Verification Success Title Text | The text displayed as the title on the verification success page. |
| Verification Success Description Text | Additional description or information text displayed on the verification success page. |
| Verification Success Image Url | The URL to the image displayed on the verification success page. |
| Verification Fail Title Text | The text displayed as the title on the verification fail page. |
| Verification Fail Description Text | Additional description or information text displayed on the verification fail page. |
| Verification Fail Image Url | The URL to the image displayed on the verification fail page. |
- reduGuestDataRetrieve: This component is used to retrieve the details of the logged-in user's contacts.
| Configurable Attributes | Description |
| Logo Url | The URL to the logo image used in the view user contact details page. |
Step 2: Set up custom setting
- Go to “Setup”.
- From Setup, in the Quick Find box, enter ‘Custom Settings’.
- Click on ‘Manage’ besides the 'RIO Ready Settings', then click on New at the top of the ‘Default Organization Level Value’

- Fill in all the fields
| Fields Name | Description |
| Guest Authentication Domain URL |
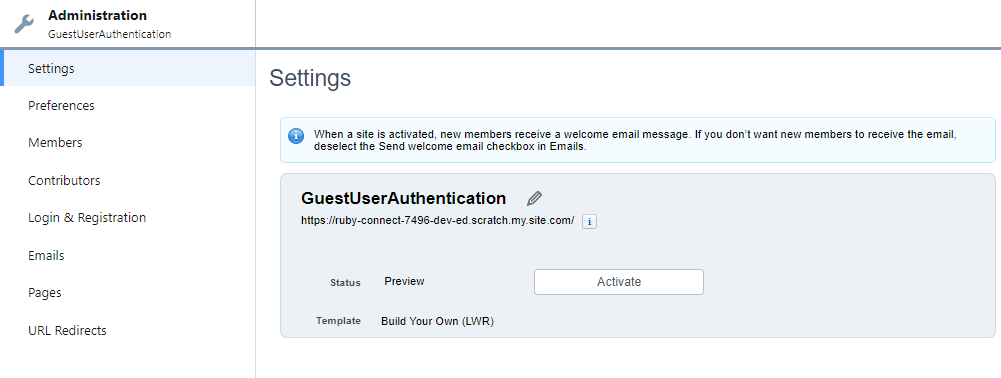
The URL where the reduGuestTokenVerification component is placed. You can obtain the domain URL from the 'Administration' page in the digital experiences.
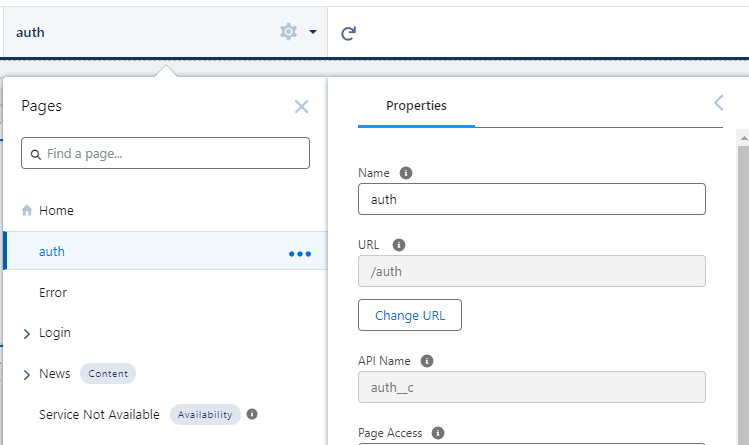
Then, append the URL behind the domain URL you have set for the page where the reduGuestTokenVerification component is placed. For example, you can check the page URL by opening the builder, navigating to the page, and clicking on the gear icon beside the page name. (The image is just for reference; your implementation might be different.)
|
| Guest Encryption Secret | A 16-character secret used for authentication token encryption. The characters can be in any combination. |
| Guest Token Expiration Period | The number of minutes of when a token will expired. |
| Guest Token Request Limit | The maximum number of login tokens that can be requested by a user in a minute. |
- Sample Custom Setting:

Step 3: Set up an Organization-Wide Email Address
- Go to “Setup”.
- From Setup, in the Quick Find box, enter ‘Organization-Wide Addresses’.
- Add a new Organization-Wide Email Address with the Display Name: LoginNoReply (Please ensure the display name is this, otherwise the email might not be sent). You can use any valid email address you want and check the "Allow All Profiles to Use this From Address" checkbox.
- Verify your Salesforce Organization-Wide Email Address from the email.
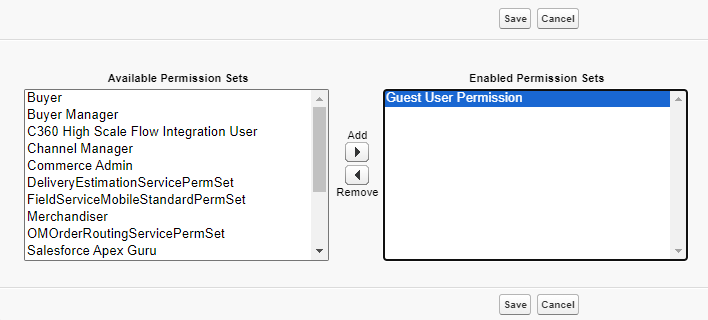
Step 4: Assign Permission Set to Guest User
- In your Experience Builder, click on "Settings" using the gear icon on the left-hand side. Then, click on the profile link under the "Guest User Profile" title.
- Click on the "View Users" button, and then click on the user's name.
- In the "Permission Set Assignments" section, click on the "Edit Assignments" button.

- Add the Guest User Permission and save the changes.
Schedule-Triggered Flow:
In order to reduce unused data in the database, we have included a Schedule-Triggered Flow in this feature to clean up Login Request object records that are older than two days daily. The flow is default set as Not Activated. Follow the steps below if you wish to activate the flow:
- Go to “Setup”.
- From Setup, in the Quick Find box, enter ‘Flows’.
- Find a flow named ‘Delete Login Requests Older Than Two Days’.

- Click on the down arrow, then click on ‘View Details and Versions’.
- Click the ‘activate’ button next to the ‘Delete Login Requests Older Than Two Days’ flow.

