How to create a Session using Session Template
Table of Contents
Overview
The following article covers the process of creating a Session, by using a Session Template.
The Session Template will help to speed up the creation of Sessions.
Use case
An educational institution is offering a Course, whereby the classes (Sessions) will be administered every Thursday at 9 am, and Friday at 3 pm.
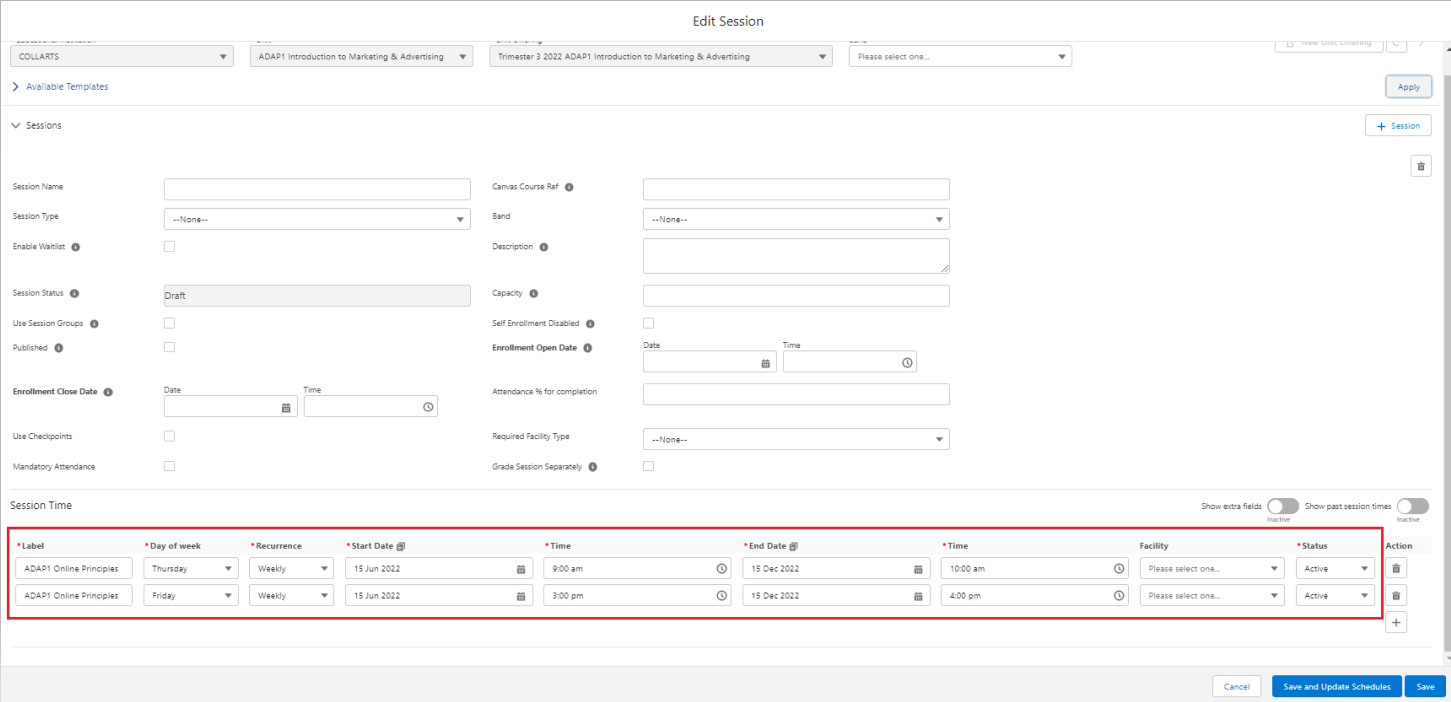
Sessions are created using the Session Scheduler, where the admin will need to define the Session Time, the day of the week, recurrence, and facility.
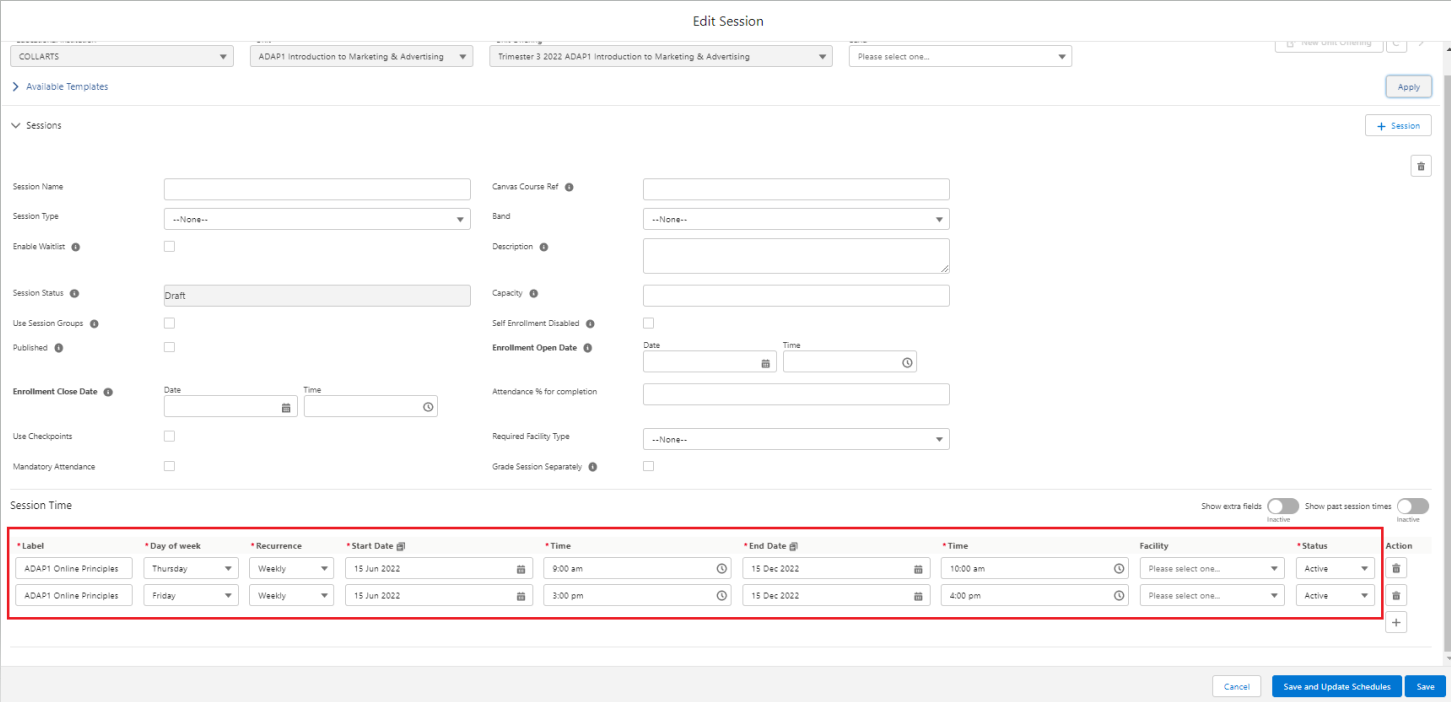
A Session Template can be created to act as a template, that pre-defines those information (highlighted in the red square above).
Rather than repetitively filling in those information when creating a Session, the Session Template can be applied, to automatically populate the Session Time information.
How to create a Session Template
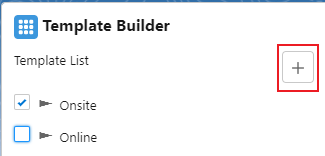
1. Go to the Session Template Builder and click on the  button.
2. Fill up the Educational Institution and the Course / Unit.

3. Click on the 'Add new row' button and fill in the information.

4. Click on the 'Done' button.
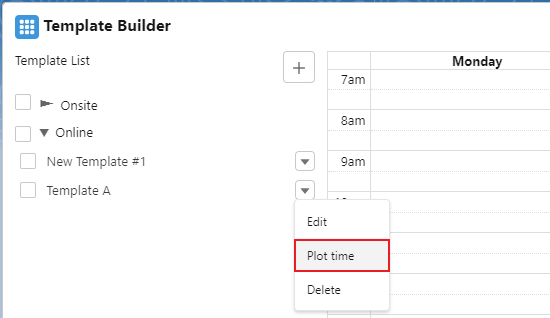
5. In the template list, find the created template 'Template A'.
6. Click on the edit icon and select the 'Plot time' option.
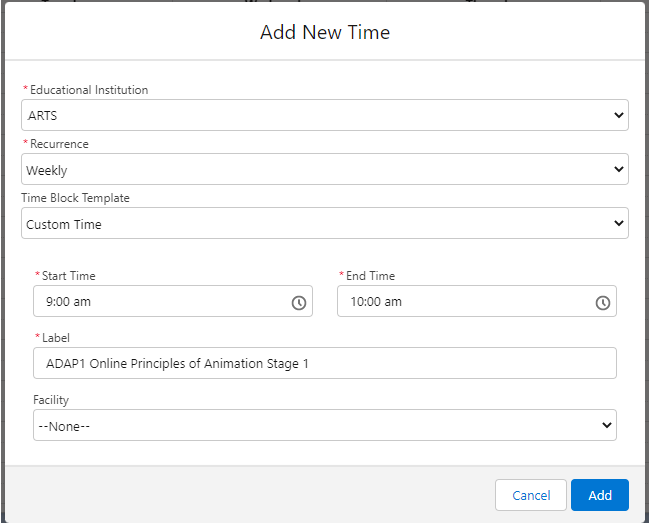
7. Click on the slot that you want to plot the time (e.g.: Thursday 9 am).
8. Fill up the below information and click on the 'Add' button.
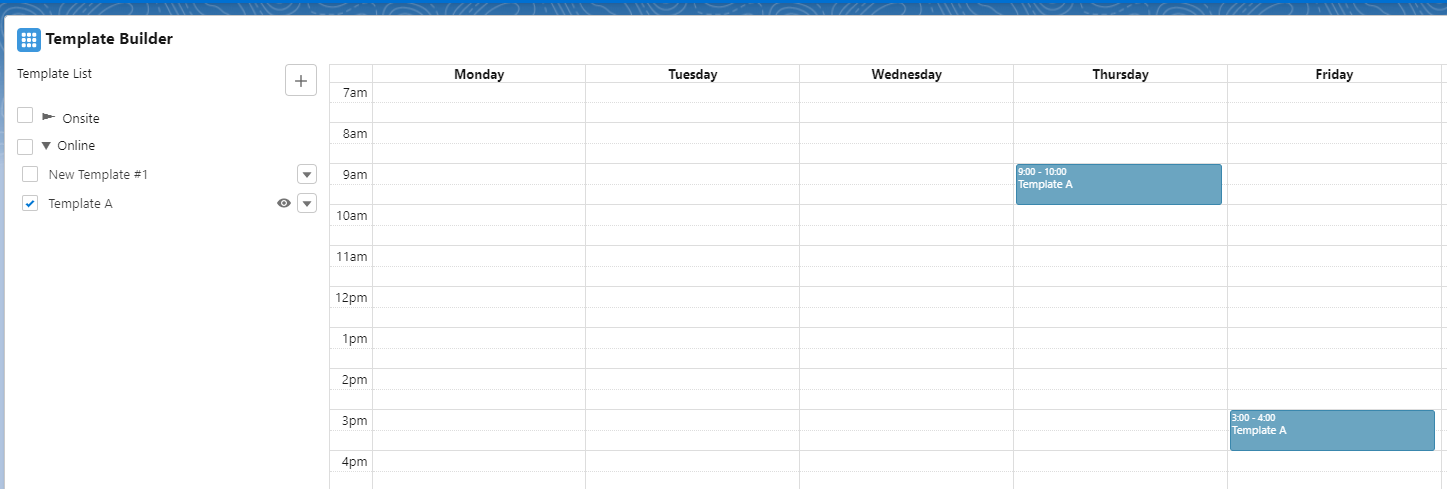
9. The created Session Template will be shown according to the time that was plotted.

10. You may plot different times for the Courses and it will be shown in the template builder.
How to create a Session using a Session Template
1. Go to the Session Scheduler and click on the  button.
2. Fill the Educational Institution, Course, Course Offering, and Band accordingly. The Session Template (created earlier) will be shown.

3. Click on the  button beside the Session Template and click on the 'Apply' button.

4. The Session Time record will be created according to the template you set up above.
These fields are automatically populated, thus saving time from having to manually fill them in.
Note:
- The template will be unchecked if a Session record with record type "Template" has the "Inactive" checkbox checked.
- You will need to enable the "Use Custom Form For Session Edit" and "Show Session Time Additional Fields" on the RIO Ed - Session Scheduler so that the fields rendered on the form will be pre-populated with the values defined in the selected Session Template.
- As of v3.12, you can hide inactive templates from the Session Template builder list (left panel). This is done via a toggle “Hide Inactive Templates” on the RIO Ed - Session Template Builder.
5. Fill up the Session information and click on the 'Save and Update Schedules' button.
6. The calendar icon will turn green and you will be able to view the Session in the view.

The class (Session) for this Course has now been automatically created for every recurring Thursday and Friday.
See also: Session Scheduler.
