RIO Ready: Student Request Functionality Setup
Student Request Functionality Setup Guide.
Table of Contents
To quickly setup the Student Request functionality, please follow the following steps:
Step 1: Define Support Users
- Login to Salesforce and go to “Setup”.
- From Setup, click on Home.
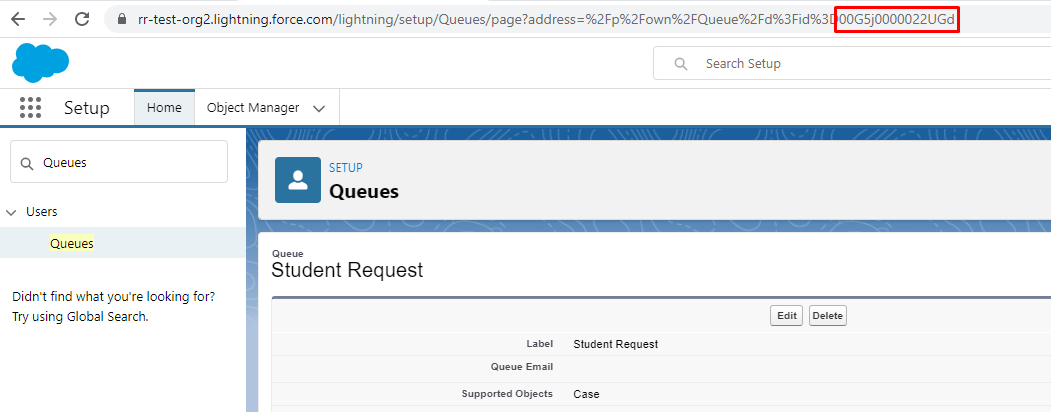
- In the Quick Find box, search for 'Queues'.
- Search if there is a Queue for Student Request.
- If there is none, you will need to create a Queue for the "Case" objects.
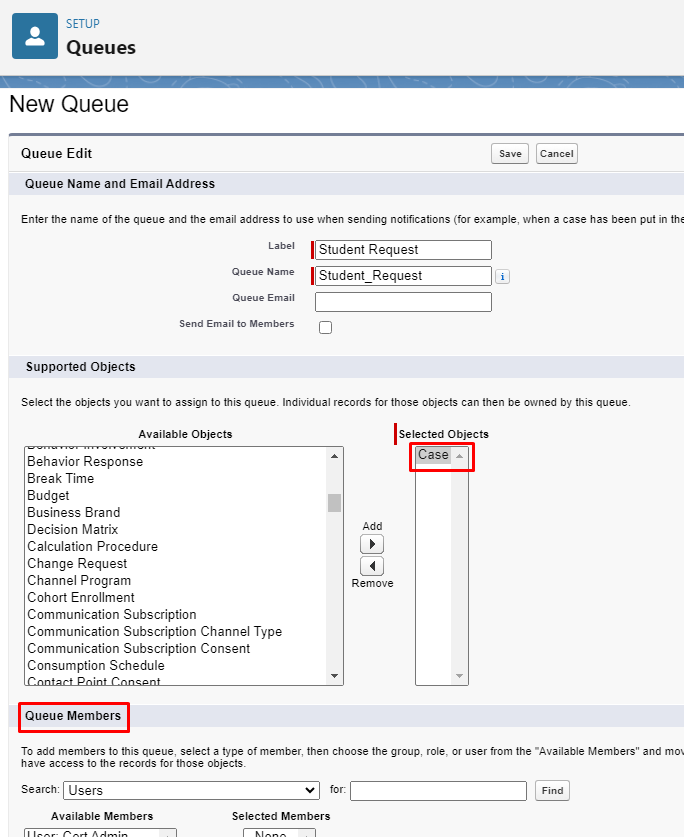
- If there is none, you will need to create a Queue for the "Case" objects.
- Click on Edit and select users under the Available Members list, then Save.
- Then, copy the queue ID at the top of the URL that starts with 00G.
Step 2: Updating and Activating the Flow
- Login to Salesforce and go to “Setup”.
- From Setup, click on Home.
- In the Quick Find box, enter Flows. Click on Flows.
- Click on "REDU Student Request".
- Click on the Manager tab in the Toolbox section.
- Click on the StudentRequestQueue. Replace the Value to the Queue Id that you have copied in the steps above and click Done.
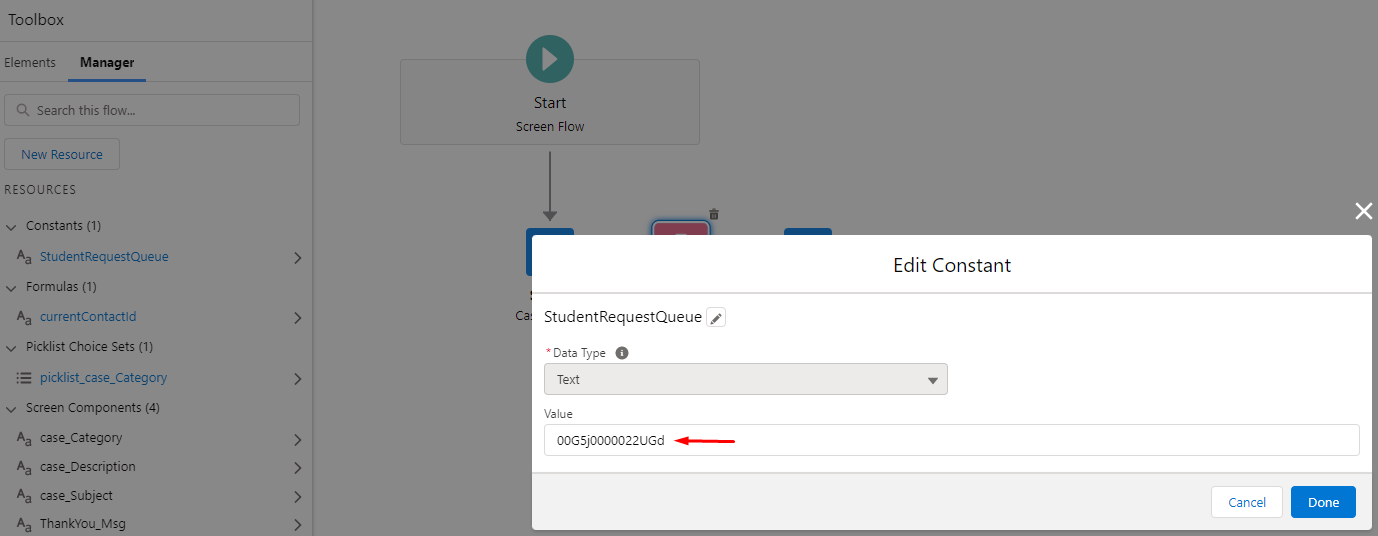
- Click on Activate to activate the flow.
Step 3: Check the sharing setting for object - Agreement
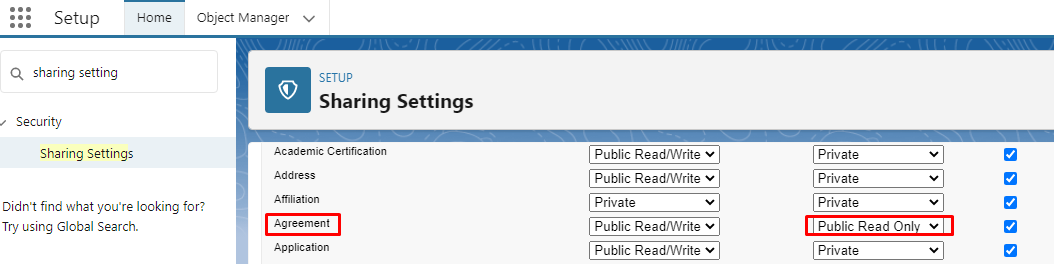
- From Setup, in the Quick Find box, enter Sharing Settings.
- Search for object - Agreement and make sure the Default External Access is set to Public Read Only.
Step 4: Including the Flow into Digital Experience Page
- From Setup, in the Quick Find box, enter Digital Experiences.
- Go to All Sites and then “RIO Education Community” and click on "Builder".
- From the top menu, in the Find a page…, enter Case List. Then, select the page.
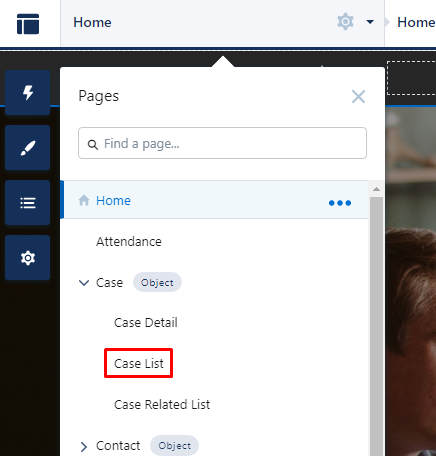
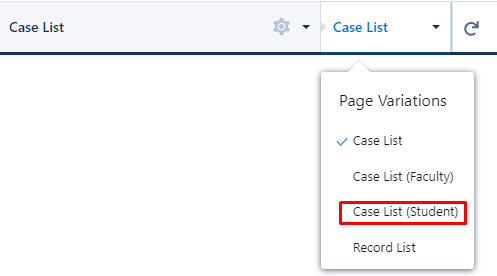
- Select Case List (Student) page variation.
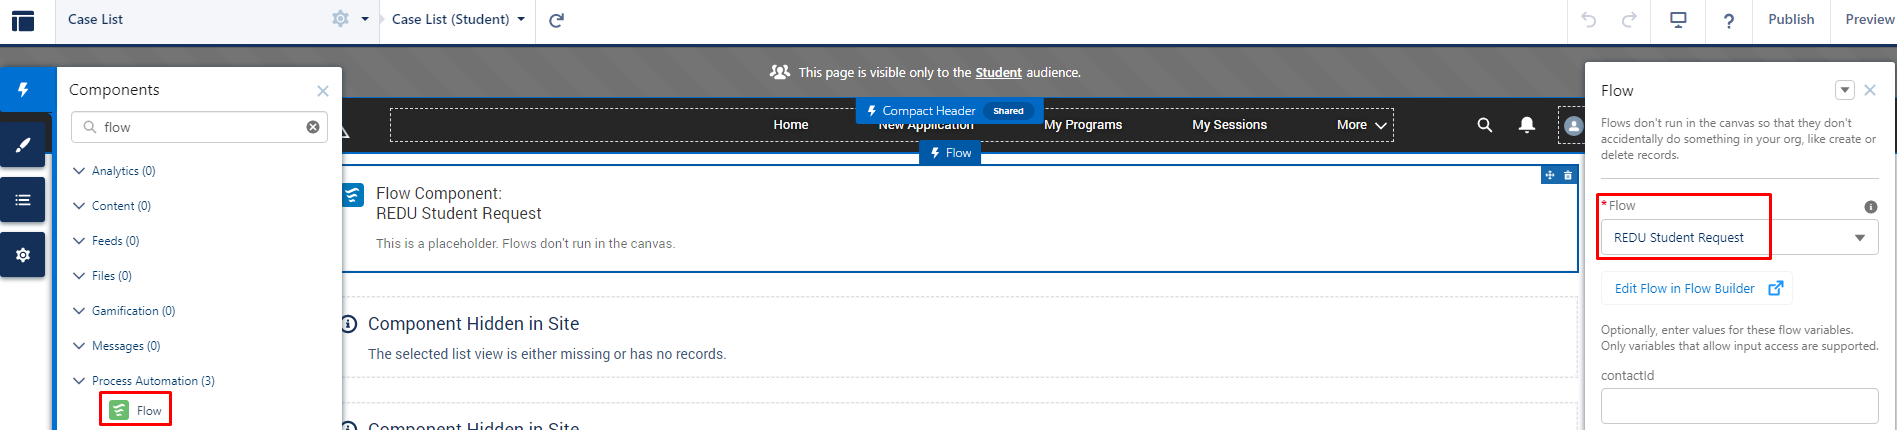
- In the Components, enter Flow. Drag and drop the Flow component into the desired section of the page.
- In the Flow component properties, select the "Student Request" flow.
- Publish the changes.