RIO Ready: Admission Rejection Document Functionality Setup
To quickly setup the admission rejection document functionality, please follow the following steps:
Step 1: S-Docs
- Login to Salesforce and go to Setup.
- From Setup, click on Object Manager.
- In the Quick Find box, enter Installed Packages. Search for S-Docs. If you are unable to find it, it means the S-Docs package is yet to be installed. You can install it here.
- Once you have installed it, you will need configure it with custom object. Please follow the steps here to link it to the Program Application object.
Step 2: Custom Button (Action)
- The custom button “Generate Document” can only be made available when S-Docs is installed.
- If S-Docs is already in place, go to Setup.
- From Setup, click on Object Manager.
- In the Quick Find box, enter Program Application. Click into the object.
- In Page Layouts, edit “RIO Education Program Application Layout”.
- Include the “Generate Document” action into the layout and Save. If the action is not found, follow the steps below to create one.
- From Setup, click on Object Manager.
- In the Quick Find box, enter Program Application. Click into the object.
- Click on Buttons, Links, and Actions.
- Click on New Button or Link.
-
Enter the following details:
- Label: Generate Document
- Name: This will be auto-populated
- Display Type: Detail Page Button
- Behaviour: Display in existing window without sidebar or header
- Content Source: URL
- Button or Link URL: {!URLFOR('/apex/SDOC__SDCreate1', null,[id=rio_ed__Program_Application__c.Id, Object='rio_ed__Program_Application__c'])}
Step 3: Admission Rejection Template
- The Admission Rejection template can only be made available only when S-Docs is installed.
- If S-Docs is already in place, search for S-Docs app from the app switcher.
- Click on the S-Docs Templates and look for Admission Rejection Letter. This is a ready-template for you to use.
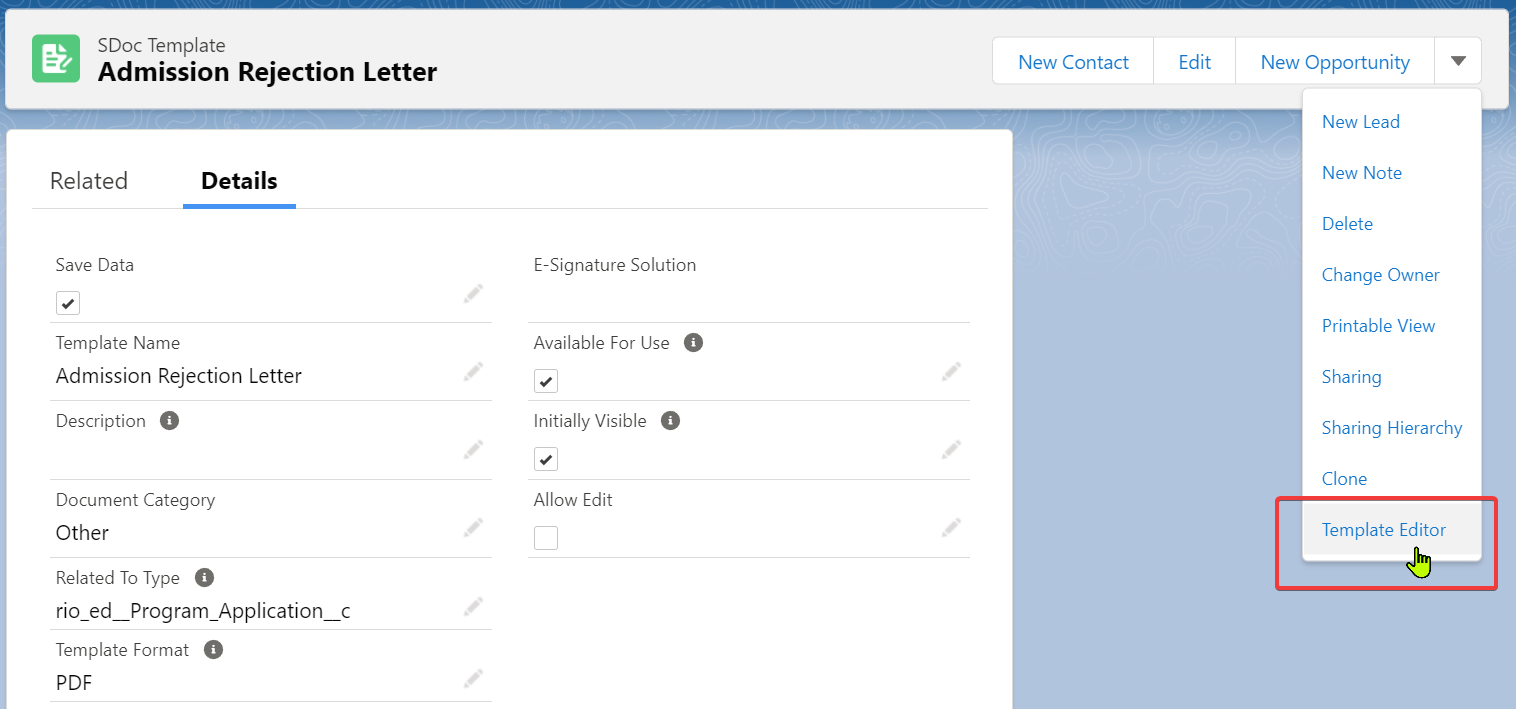
- If you are not able to find the Admission Rejection Letter template record, then create a new Template and follow the steps below:
- Make sure that the Template Name is set to “Admission Rejection Letter”.
- Set the "Related To Type" to "rio_ed__Program_Application__c".
- Set the "Template Format" to "PDF".
- Make sure that "Available For Use" is checked.
- Open the "Template Editor" from the menu on the top right.

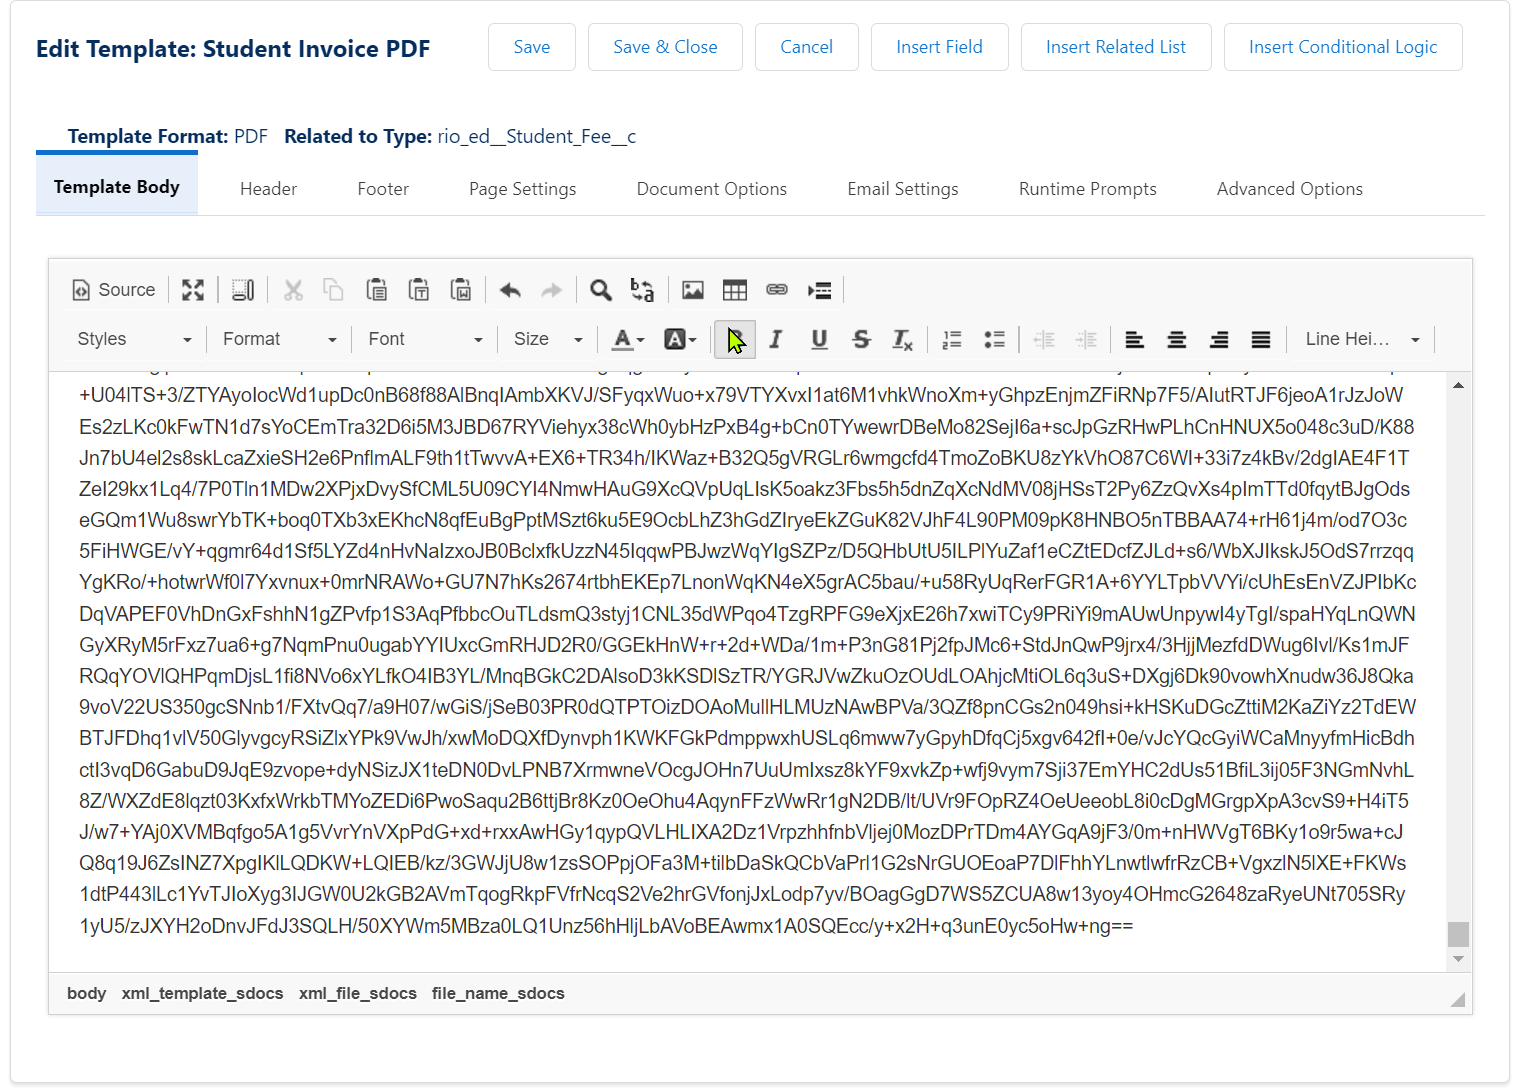
- Copy the text contained in the file below:
Admission Rejection Letter.txt - Paste that text into the Template Body section:

- Save & Close to complete the process.