RIO Ready: Scholarship Functionality Setup
Table of Contents
To quickly setup Scholarship, please follow the following steps:
Step 1: Activating the Flow
- Login to Salesforce and go to “Setup”.
- From Setup, click on Home.
- In the Quick Find box, enter Flows. Click on Flows.
- Click on REDU Scholarship Application.
- Click on Activate.
Step 2: Including the Flow into Digital Experience Page
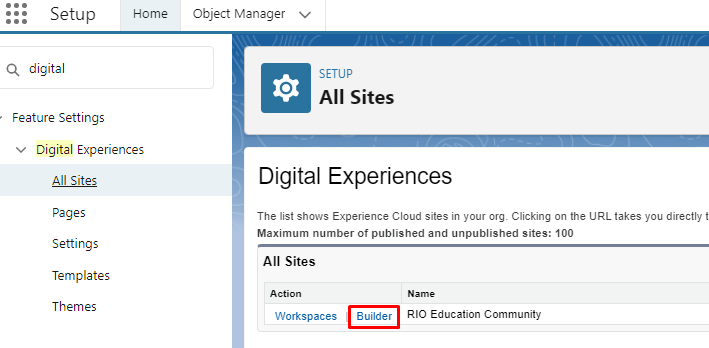
- From Setup, in the Quick Find box, enter Digital Experiences.
- Go to All Sites and then “RIO Education Community”, and click on "Builder".

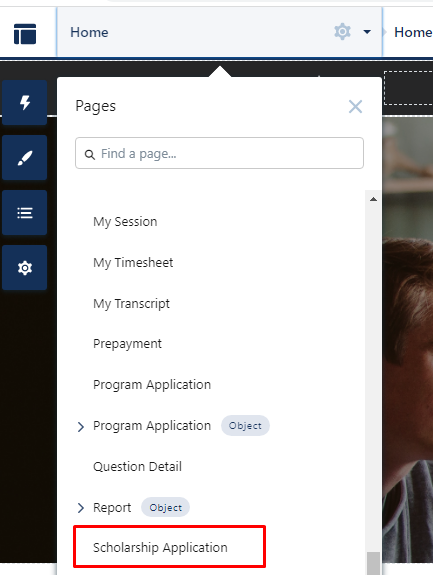
- From the top menu, in the Find a page…, enter Scholarship Application. Then, select the page.

- Search for Flow in the Components section. Drag and drop the Flow component into the desired section of the page.
- In the Flow component properties, select the "REDU Scholarship Application" flow.

Step 3: Assigning Scholarship Permission Set to the Student
If Login/Self Registration is installed:
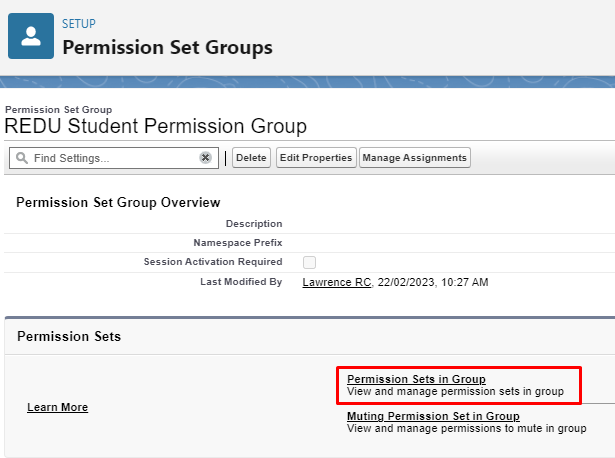
- Add the Permission Set "REDU Student Scholarship Permissions" into the Permission Set Group "REDU_Student_Permission_Group" by going into Setup, typing into the Quick Find box, enter "Permission Set Group".
- Click on "Permission Sets in Group".

- Click on "Add Permission Set".
- Select "REDU Student Scholarship Permissions" and then click Add.

If Login/Self Registration is not installed, then please assign the Permission Set "REDU Student Scholarship Permissions" to the new Student users either manually or with custom automation.
Note:
You will need this page that you have just created to be accessible by students.
Scholarship is only one of the types of applications students can make in the Student Community.
You can create a main page for applications. From there, students can select which type of application they wish to make.
See setup here.
