Master Data Preparation
RIO Recipe has some ready made template for RIO Education master data. You can make a copy with our data template and use the guide below to prepare the master data for a customer.
Master Data Template
Import Template
- Use the standard master data import file template.
There are currently 2 versions. Due to changes to the structure of several objects from v3.12 onwards , you can utilize a previous version from here (pre 3.12 master data template).
To access the template for v3.12 onwards, please utilize the latest version from here ( post 3.12 master data template)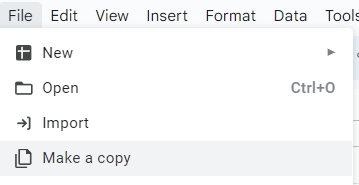
- Open the 2nd tab/page of the spreadsheet. The Record Type Id values here are just template values.
You will need to populate the actual Record Type Id values for this list, using the actual values from your instance: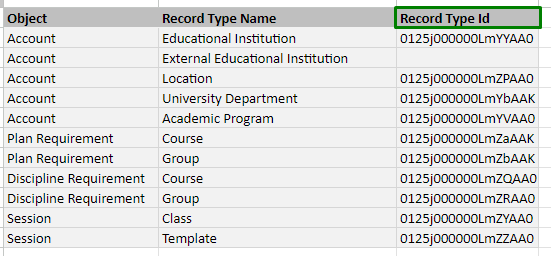
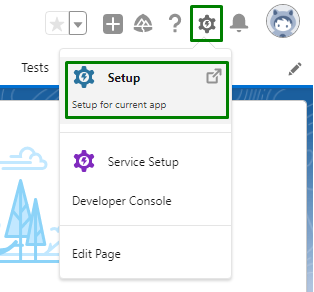
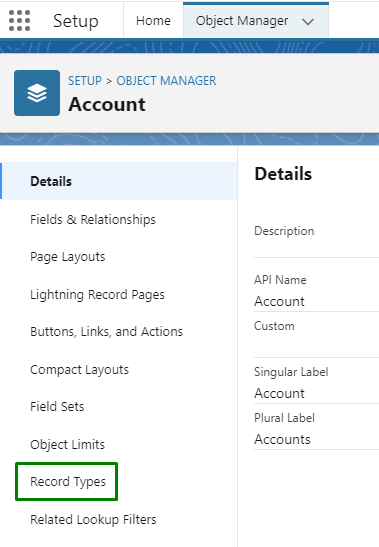
- Go to Setup > Object Manager.
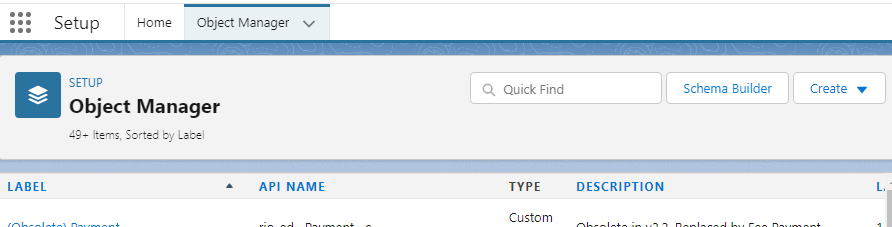
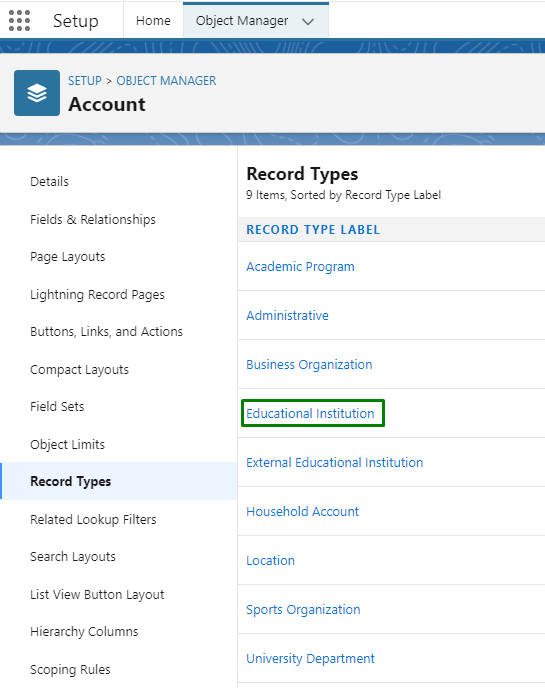
- Search for the listed objects, and navigate to the Record Types section.
- Open the record types as per the list in your template spreadsheet.
- Copy this specific part of the URL and paste it in the Record Type Id on your template spreadsheet.

- Repeat the same for all the objects listed on the 2nd tab/page of the spreadsheet.
- Go to Setup > Object Manager.
External IDs
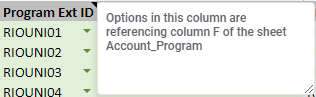
You will see a special column with label that contains "Ext ID" or External ID". The values in this column will be auto populated and used as keys to link the related data together.
Import Mapping
- A list of migration mapping in .sdl format is also available for use. You can download them here and use it for data import of each objects.
- These mappings are based on the templates provided above.
Sample Master Data File
- If you need to import sample data for demo or test purposes, you can download them here.
- Use the pre-defined mapping to import them by following the correct sequence.
Note
When making a master data import file, there are several considerations to keep in mind that may aid current and future users in understanding and using the file.
- Columns that are marked in GREY, such as the External ID or Record ID column, are not to be edited or deleted.
- It is better to make a note at the column header if a formula is used, in order to better explain the contents and reference of the formula for other users of the file.
- Fields that are marked in RED TEXT indicate that it is a required field and must contain data.
- Columns that are marked in GREEN are Data Validation cells, and are also not to be deleted. A note explaining where the reference data is coming from is also recommended.
Data Loader steps:
Step 1: What method to use?
When uploading data to an instance, you have 3 options to choose from: Insert, Update, Upsert.

- Insert: Creates new records in the instance.
- Update: Updates existing records in the instance.
- Upsert: A combination of both Insert and Update. To do an upsert, you must include either the Salesforce ID or an External ID column in your CSV file.
Usually when loading data into a brand new instance, the go-to option is to Upsert since the RIO Education Master Data sheet relies heavily on External IDs to link different records of data to different objects. However, if you're looking to update data in an instance, the safer option is to always Update the records in the instance based on the same External IDs or Salesforce IDs. This can prevent any accidental duplicates when using Upsert.
The following steps are that of Upsert only.
Step 2: Select data objects

Choose the Object you wish to load the data in, and select the CSV file that holds the data. For example, if you are inserting Account records, select Account, and choose your own Account CSV file that contains the source data records. You must select and highlight the Object name in the list in order to click Next and proceed.
Step 2a: Choose field to use for matching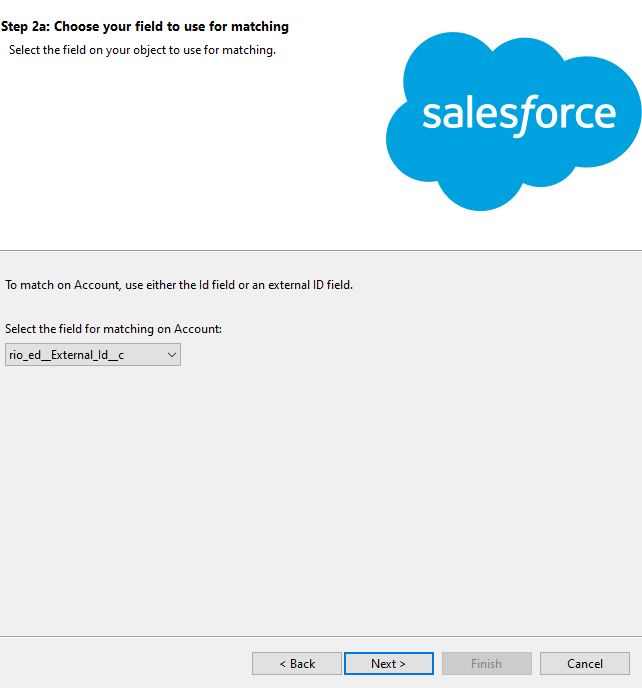
More often than not, we'll only be using RIO Education External ID field for matching, which is rio_ed_External_Id__c.
Step 2b: Choose related objects (Optional)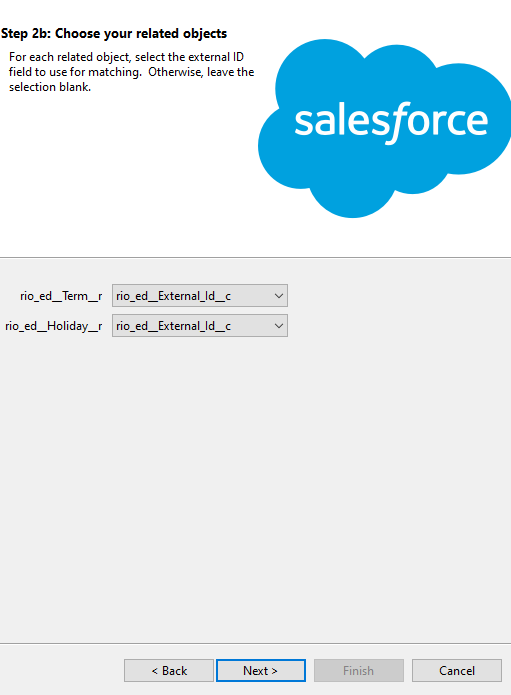
This optional step is for when you have records that are linked to other Object record fields. For example, Term Holiday requires both Term and Holiday fields, so we select the Term and Holiday External ID fields to map to. If there are no related object fields, it is fine to leave it blank.
The mapping files provided will already have the External ID reference, so it is fine to skip this step and leave it blank regardless. Specifying the External ID here and in the mapping files simultaneously will not cause any conflicts.
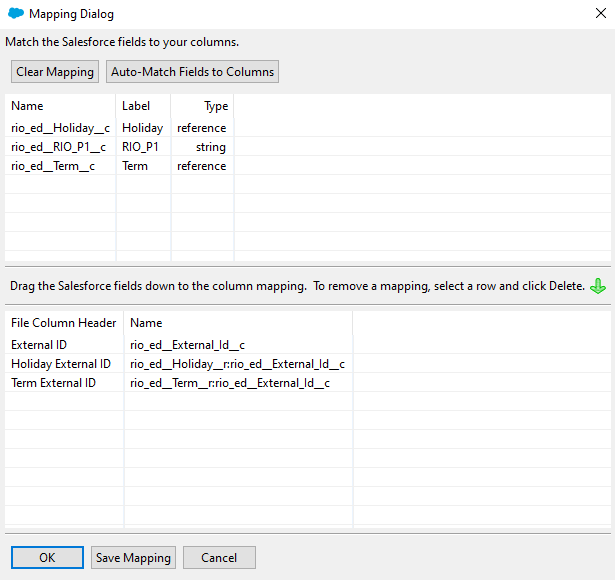
Step 3: Assign field mapping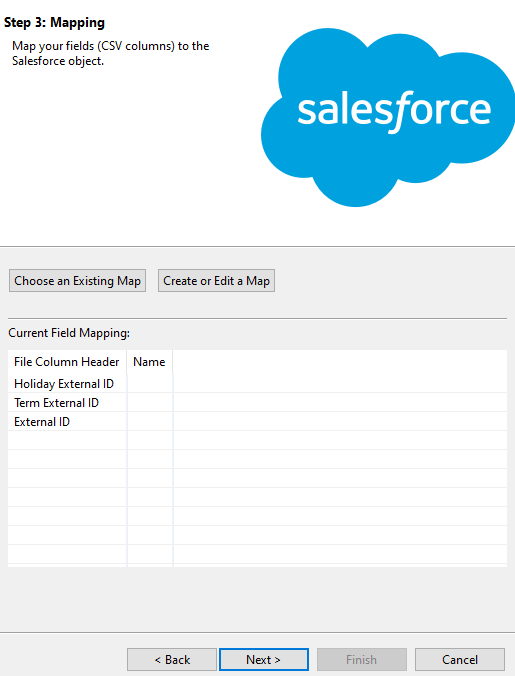
To select and use our existing field mapping that RIO Education has provided above, select the 'Choose and Existing Map' option and browse for the .sdl file that has been downloaded earlier.
Or you can also choose to map the fields on your own by selecting the 'Create or Edit a Map' option, which will pop up a window for you to drag and drop the fields you want to map to.
Step 4: Finish
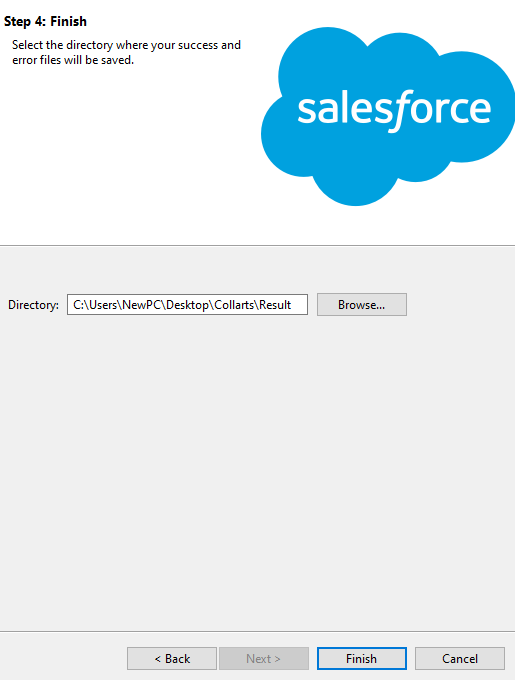
For the final step, just choose a Directory to store your Data Loader results and click Finish.
For further details on using Salesforce Data Loader, you may read this official documentation provided by Salesforce.
Master Data Import Sequence
Before you can begin using RIO Education, you will need to ensure that the master data is ready.
To import the master data, you MUST follow this sequence. Failure to do so will result in unlinked data.
The sequence of master data import is as follows:
| Sequence of the Master Data | Description |
| 1. Educational Institution (Account) |
The institution record e.g. RIO University. |
| 2. Campus (Account) |
The campus record(s) e.g. Sunshine Coast, Sydney. |
| 3. Facility |
The location record(s) e.g. Lecture Hall 01, Computer Lab 01, Room 01. |
| 4. Grade Settings |
The grade translations e.g. 80 - 89.9 equals a Distinction. |
| 5. Term | The study period of the institution e.g. Summer 2022, Fall 2022, Winter 2022, Semester 1, Semester 2. |
| 6. Fee | Fee records used to charge the students e.g. application fee, tuition fee. |
| 7. Fee Schedule | The tuition fee for last year was $2500 and for this year is $2750. |
| 8. Fee Schedule Term | The availability of the fee schedule e.g. the tuition fee of $2750 is available in Fall 2022 and Winter 2022. |
| 9. Holiday | New Year’s Day, Christmas, Term breaks, etc. |
| 10. Term Holiday | The holidays for the Term e.g. summer break. |
|
11. University Department (Account) |
The institution’s division/school record e.g. School of Business. |
| 12. Course | The Course records that the institution offers e.g. BUS101 Introduction to Business. |
| 13. Course Requirement* |
The requirement of the Courses such as pre-requisites and co-requisites, eg, in order to enroll into BUS102, the student must first complete BUS101. * Note: If this is used, there is no need to use Program Course Requirement (see #18 below), unless there are specific or special requirements to be made. Course Requirement is mainly for requirements that are repeated across different Programs. If each Program's Courses have their own unique requirement, please use Program Course Requirement instead. |
| 14. Academic Program (Account) | The Program records that the institution offers e.g. Bachelor of Business Administration. |
| 15. Program Plan | The Program’s plan that the institution offers for a certain time period also known as the Program version e.g. Bachelor of Business Administration (current version). |
| 16. Plan Requirement - Group |
The Program Plan’s requirements at a group/parent level e.g. Core Requirements, Business Electives, General Electives, etc. |
| 17. Plan Requirement - Course | The Program Plan’s requirements at a granular level e.g. under the “Core Requirements” students are required to complete BUS101, BUS102, etc. |
| 18. Program Course Requirement* |
The requirement of the Courses such as pre-requisites and co-requisites, e.g. in order to enroll into BUS102, the student must first complete BUS101. * Note: There is no need to use this if you have already used Course Requirement (see #13 above), unless there are specific or special requirements to be made. |
| 19. Program Pathway | The recommended path records of the Program e.g. the recommended Terms to complete a Bachelor of Administration is 8 Terms. |
| 20. Pathway Unit |
The recommended Plan Requirements (Group/Course) to enroll for each Term numbers e.g.
|
| 21. Program Discipline | The discipline of the Programs offered such as major or minor e.g. Major in Marketing. |
| 22. Discipline Requirement - Group |
The discipline’s requirements at a group/parent level e.g. Business Requirements, Marketing Requirements, etc. |
| 23. Discipline Requirement - Course | The discipline’s requirements at a granular level e.g. under the “Business Requirements”, students are required to complete BUS101, BUS102, etc. |
| 24. Contact (Faculty) | Contact record information of Faculty members e.g. First Name, Last Name, Email. |
| 25. Course Offering | The Courses offered on different Terms e.g. BUS101 in Fall 2022, BUS102 in Winter 2022 with capacity defined. |
| 26. Session | The Sessions of the Course Offerings e.g. For BUS101 in Fall 2022, there are 2 “Lecture” sessions and 2 “Tutorial” sessions for students to choose from. |
| 27. Session Time |
The Session Times of the Sessions e.g. for: Lecture 1:
|
| 28. Contact (Student) (if applicable) |
Contact record information of student members e.g. First Name, Last Name, Email. |
| 29. Appointment Type | The Appointment Type for selection in the Appointment Scheduler |
| 30. Appointment Time | The time slots available for the Appointment Type in the Appointment Scheduler |
| 31. Appointment Availabilities | The Facility or Consultant available for selection in the Appointment Scheduler. |
| 32. Housing | Housing record to allocate Student accommodation. |
| 32.1 Room Allocation | Room allocation for Students. |
| 32.2 Housing Extra | Extra allowances related to Housing. |
| 33. Agreement | Agreement between Institutions for Course to be used as Transfer Credits. |
| 34. Agreement Course | The Courses for transfer. |
| 35. Qualified Faculty | The Course(s) that a Faculty is qualified to teach. |
| 36. Grade Criteria | The criteria that a Course will be graded on, e.g. assignments, mid-term exam, final exam. |
| 37. Cohort Enrollment | Opens enrollment to Course Offerings and Sessions for a specific cohort of students (i.e. Senior) before the actual enrollment open date. |
| 38. Funding | Scholarship funding that is available for students to apply. |